
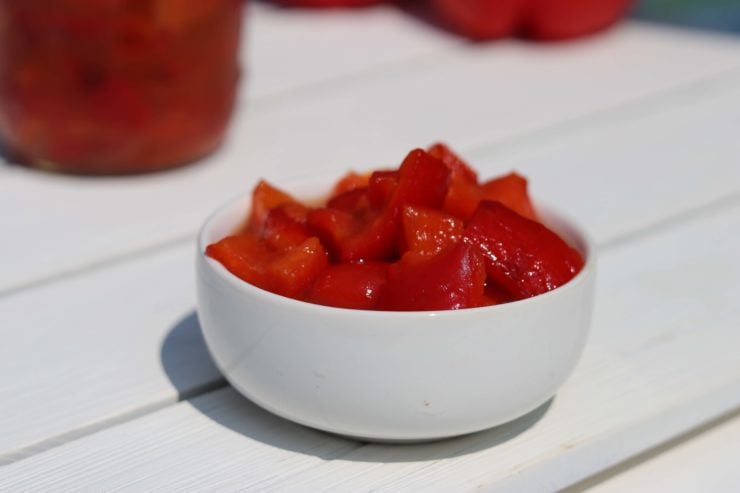
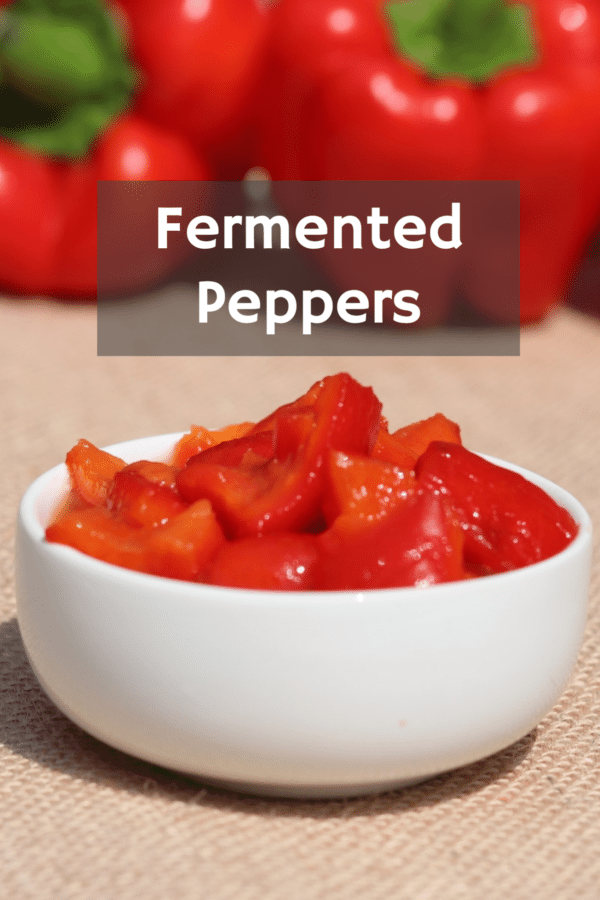
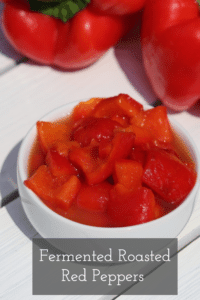
These fermented peppers are right up with fermented herbs as one of my favorite ferments! With the herbs, I am finding a tasty way to preserve the fresh taste of the overflowing bounty that comes out of my garden, not so with the peppers. Sadly, I have never had luck growing red bell peppers in the Pacific Northwest, so I have to get these from my co-op or farmer’s market.
This recipe works with all sorts of peppers, but red bell peppers are my absolute favorite. Use your fermented peppers on on top of a salads, hummus, or anywhere you would use a roasted red pepper.
To make fermented peppers, you will need:
- 5 or 6 red bell peppers
- 1 tablespoon Celtic sea salt
- Starter culture (I use Cutting Edge), or 2 tablespoons whey or brine from another ferment (be advised that results will vary with these last two options)
- 2 cloves smashed garlic (optional)
- Sterilized quart mason jar
- Airlock lid (optional)
- Fermenting weight or large flat sterilized rock
Directions for Fermented Peppers:
- First, roast the peppers on a baking tray. I put the top rack all the way up and do this by broiling on high. You want the outside to get blackened and charred. Turn the peppers periodically to be sure they blacken all over. (For spicy peppers, you can omit this step. Just seed and chop them.)
- Place your peppers in a glass bowl and cover them with a towel. Find something else to do while you wait for them to cool down, like make these fermented herbs.
- While you are waiting, you can mix your starter culture with some cool filtered water. Follow the directions on your package. I use a half package of Cutting Edge starter. (Note that you do need to use a starter culture because we have roasted the peppers and killed any naturally occurring bacteria that was present. If you don’t roast the peppers, you could just ferment with 3 tablespoons of Celtic sea salt.)
- Dissolve your Celtic sea salt in a bit of hot filtered water.
- Once your peppers are cooled, seed them and peel off the skins and compost. All of this should come right off easily.
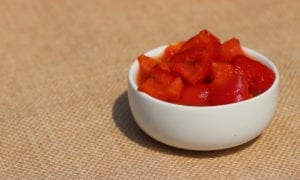
- Next, cut your peppers either into strips or bite-sized pieces. I like both options, but stick to one size per jar so that all the pieces ferment at the same rate.
- Fill your jar with your cut peppers, garlic, and dissolved starter culture.
- Next add your dissolved salt. Be sure it has cooled down to where you can comfortably stick your finger in it. We don’t want to kill the bacteria in the starter culture!
- Fill the jar the rest of the way with room temperature filtered water. Be sure to leave at least an inch of head space for expansion.
- Add your fermentation weight (or rock) to weigh down your peppers and keep them tucked safely under the brine solution.
- Top your jar with your airlock lid (optional, but very recommended as it allows air to escape but not to enter which keeps your ferment safe!)
- Set your jar out of direct light for about 3 days and up to a week. Keep checking in on your ferment from time to time to see if it has reached your desired taste. Once it does, put your fermented peppers promptly in your fridge to slow fermentation. Enjoy!!
Fermented Peppers
Another delicious ferment loaded with probiotics!
Ingredients
- 5 or 6 red bell peppers
- 1 tablespoon Celtic sea salt
- Starter culture
- 2 cloves smashed garlic optional
- Sterilized quart mason jar
- Airlock lid optional
- Fermenting weight or large flat sterilized rock
Instructions
- First, roast the peppers on a baking tray. I put the top rack all the way up and do this by broiling on high. You want the outside to get blackened and charred. Turn the peppers periodically to be sure they blacken all over. (For spicy peppers, you can omit this step. Just seed and chop them.)
- Place your peppers in a glass bowl and cover them with a towel. Find something else to do while you wait for them to cool down, like make these.
- While you are waiting, you can mix your starter culture with some cool filtered water. Follow the directions on your package. I use a half package of Cutting Edge starter. (Note that you do need to use a starter culture because we have roasted the peppers and killed any naturally occurring bacteria that was present. If you don't roast the peppers, you could just ferment with 3 tablespoons of Celtic sea salt.)
- Dissolve your Celtic sea salt in a bit of hot filtered water.
- Once your peppers are cooled, seed them and peel off the skins and compost. All of this should come right off easily.
- Next, cut your peppers either into strips or bite-sized pieces. I like both options, but stick to one size per jar so that all the pieces ferment at the same rate.
- Fill your jar with your cut peppers, garlic, and dissolved starter culture.
- Next add your dissolved salt. Be sure it has cooled down to where you can comfortably stick your finger in it. We don't want to kill the bacteria in the starter culture!
- Fill the jar the rest of the way with room temperature filtered water. Be sure to leave at least an inch of head space for expansion.
- Add your fermentation weight (or rock) to weigh down your peppers and keep them tucked safely under the brine solution.
- Top your jar with your airlock lid (optional, but very recommended as it allows air to escape but not to enter which keeps your ferment safe!)
- Set your jar out of direct light for about 3 days and up to a week. Keep checking in on your ferment from time to time to see if it has reached your desired taste. Once it does, remove it promptly to your fridge to slow fermentation. Enjoy!!
Tried this recipe?Let us know how it was!


