Fermented Radishes are a tasty way to get your probiotics! Enjoy them in a salad, on a crudités plate, or solo as a snack. They have a delightful peppery pickle-like flavor. Radishes are packed with nutritional benefits as well. They live up to the “food as medicine” ideal. Let me breakdown the nutritional benefits radishes for you. The printable recipe is at the bottom of the post.
Radishes:
are a great source of vitamin c
are naturally diuretic (which is helpful to the kidneys and the urinary tract)
are full of fiber (fiber helps keep your digestion moving and helps your body rid itself of excess hormones, among many other things)
Place the starter culture in a dish of cool filtered water. (Follow the directions on your specific package.)
Put the salt in a bit of warm water to dissolve.
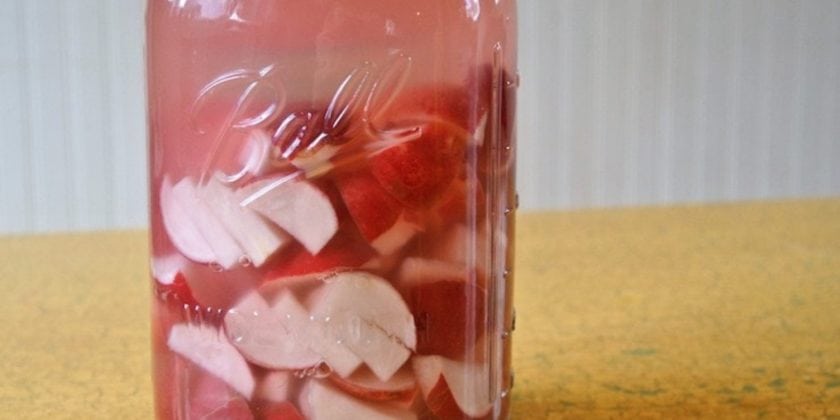
Cut the radishes. I like to cut small ones in half and larger ones into fourths or sixths.
Put the radishes and starter culture in your clean mason jar.
Pour the salt water over the top. Add more filtered water if needed to make sure the radishes are completely covered, but leave an inch or so at the top to allow for expansion.
Let the radishes sit in a dark place for at least 3 days and up to a week. (Test to find when it is fermented to your liking.)
Transfer to the fridge to slow the fermentation process. These will easily keep in the fridge for 6 months or more, but I highly doubt they will last that long! You can experiment with adding different herbs if you like.
Place the starter culture in a dish of cool filtered water. (Follow the directions on your specific package.)
Put the salt in a bit of warm water to dissolve.
Cut the radishes. I like to cut small ones in half and larger ones into fourths or sixths.
Put the radishes and starter culture in your clean mason jar.
Pour the salt water over the top. Add more filtered water if needed to make sure the radishes are completely covered, but leave an inch or so at the top to allow for expansion.
Place your fermentation weight on top of your radishes to keep them under the brine and then your fermenting lids on top.
Let the radishes sit in a dark place for at least 3 days and up to a week. (Test to find when it is fermented to your liking.)
Transfer to the fridge to slow the fermentation process. These will easily keep in the fridge for 6 months or more, but I highly doubt they will last that long! You can experiment with adding different herbs if you like.
If you want to try some other easy fermented veggie recipes, try fermented beets, kiddie kimchi, or a basic kraut! What about you? Have you made fermented radishes? Are you going to give it a shot?
View Comments
Yes! I love everything fermented but have never tried radishes.. yum!
They are so good! They are my kids' favorite ferment!!
I've never thought of preserving radishes like this! We certainly preserve as much we can from our summer garden. Great idea!