As with many of the labors of love that come out of the kitchen, the Instant Pot has transformed the cheesecake into a simple dessert! Now you can make a perfect cheesecake in under an hour and you don’t have to worry about it cracking or becoming too dry or any of the other possible cheesecake problems! This one is an Egg Nog cheesecake with a gluten-free, no bake crust and no refined sugar. It is so delicious and yet it contains healthy fats from the organic cream cheese, the pastured egg, and the grass-fed egg nog! You can feel good about indulging in this one!
Notes about Instant Pot Egg Nog Cheesecake:
- I either make my own eggnog or use the best that I can find at the store. If you want to try making your own eggnog, check out this recipe from The Pistachio Project: “Healthy Homemade Eggnog“. If you want to do a dairy-free egg nog, try this Hempnog from Strength and Sunshine.
- I love to use a dark, spiced rum to enhance the eggnog flavor. If you don’t want to add rum, just add more vanilla instead. Just be sure to use real vanilla!
- You need a special pan for this cheesecake that fits in your Instant Pot.
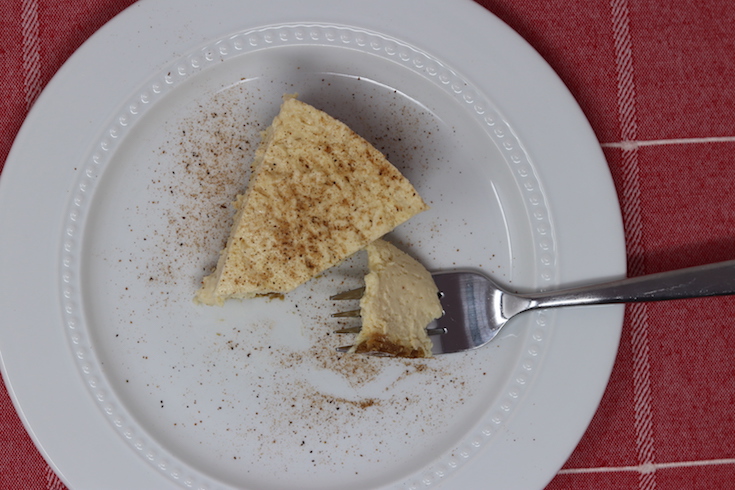
- This is a light eggnog flavor–not too overpowering. If you want more eggnog flavor, you can add more of the spices that go into eggnog like vanilla, cinnamon, and nutmeg.
- I keep an extra IP ring so that I have one for savory items and one for sweet items. If you have been using your IP, you know that the ring holds onto smells. In order to be sure that no savory odors end up on my sweet dish, having an extra ring does the trick. You can buy replacement packs of rings in different colors to make it easy to remember which is which.
Instant Pot Egg Nog Cheesecake
This Instant Pot Egg Nog Cheesecake is a perfect dessert for the holidays. Making cheesecakes in the Instant Pot is one of my favorite applications of one of my favorite kitchen tools! It takes much less time than the oven, and it produces a perfect cheesecake.
For the No-bake Crust:
- 3/4 cup gluten-free graham crackers (about 6 crackers)
- Pinch fine sea salt
- Dash nutmeg
- 2 tablespoons salted butter, melted plus more for buttering your pan
To make the crust, mix graham cracker crumbs, melted butter, salt and nutmeg together. Press into the bottom of your 7 inch instant pot compatible, buttered cheesecake pan. Be sure to only have the crust come up partway along the sides. Put into the freezer until you are ready for it.
For the cheesecake:
- 3/4 cup Sucanat, golden monkfruit, or unrefined sugar (the monkfruit makes the cheesecake puff up a bit , but it deflates once it cools)
- 1 pastured egg
- 2 packages of organic cream cheese, softened
- 1 teaspoon vanilla (the real deal, people!)
- 3/4 cup homemade egg nog or the best you can buy
- 1/4 teaspoon fine sea salt
- Dash of nutmeg
Directions for Instant Pot Egg Nog Cheesecake:
- For the crust: Grind up the graham crackers in the bowl of you food processor. (Or you could do this old school with a plastic bag and a rolling pin.)
- Mix the graham cracker crumbs, melted butter, fine sea salt, and dash of nutmeg.
- Press the crust mixture into the bottom of your buttered cheesecake pan. Make sure to go up the side a little bit.
- Put the crust in the freezer until you are ready for it.
- To make the filling, cream together the egg and the Sucanat, monkfruit, or unrefined sugar together until the granules are dissolved. I like to use a hand mixer for this but a stand mixer works as well.
- Next, add the softened cream cheese and mix until smooth.
- Then add the rum, vanilla, egg nog, nutmeg, and pinch salt and mix until well combined.
- Pull the crust out of the freezer and fill with your cheesecake batter.
- Put 1 cup of water in the bottom of the pressure cooker. Next, put the cheesecake pan in the rack that came with the Instant Pot and lower it down into the pot carefully.
- Cook on high pressure for 25 minutes and then naturally release for 15 minutes.
- Remove your egg nog cheesecake from the Instant Pot carefully. I usually use the rack’s handles with pot holders.
- If there is any condensation left on cheesecake, carefully blot it with a fresh sack cloth or paper towel.
- Allow the cheesecake to cool completely before refrigerating.
Love the scents of eggnog?
Try this Eggnog Sugar Scrub from Pistachio Project! Absolutely delightful!
-
Instant Pot Egg Nog Cheesecake
Chelsea
A simple to make, yet elegant holiday dessert. This cheesecake has a delightful light eggnog flavor.
Prep Time 15 minutes mins
Cook Time 25 minutes mins
Total Time 50 minutes mins
For the crust
- 3/4 cup gluten-free graham crackers about 6 crackers
- Pinch fine sea salt
- Dash nutmeg
2 tablespoons salted butter, melted plus more for buttering your panFor the Filling
- 3/4 cup golden Monkfruit or Sucanat
- 1 pastured egg
- 2 packages of organic cream cheese softened
- 1 teaspoon vanilla the real deal, people!
- 3/4 cup homemade egg nog or the best you can buy
- 1/4 teaspoon fine sea salt
- Dash of nutmeg
For the crust: Grind up the graham crackers in the bowl of you food processor. (Or you could do this old school with a plastic bag and a rolling pin.)
Mix the graham cracker crumbs, melted butter, fine sea salt, and dash of nutmeg.
Press the crust mixture into the bottom of your buttered cheesecake pan. Make sure to go up the side a little bit.
Put the crust in the freezer until you are ready for it.
To make the filling, cream together the egg and the Sucanat, monkfruit, or unrefined sugar together until the granules are dissolved. I like to use a hand mixer for this but a stand mixer works as well.
Next, add the softened cream cheese and mix until smooth.
Then add the rum, vanilla, egg nog, nutmeg, and pinch salt and mix until well combined.
Pull the crust out of the freezer and fill with your cheesecake batter.
Put 1 cup of water in the bottom of the pressure cooker. Next, put the cheesecake pan in the rack that came with the Instant Pot and lower it down into the pot carefully.
Cook on high pressure for 25 minutes and then naturally release for 15 minutes.
Remove your egg nog cheesecake from the Instant Pot carefully. I usually use the rack's handles with pot holders.
If there is any condensation left on cheesecake, carefully blot it with a fresh sack cloth or paper towel.
Allow the cheesecake to cool completely before refrigerating.
View Comments
This looks so delicious that it’s almost convinced me that I need an instapot! And I love that it’s naturally sweetened too! Thank you for the inspiration. I’m all sorts of hungry now! ?
I held off on getting an Instant Pot for a while, but I am so glad I ended up getting one. I use it almost every day!
I've never made cheesecake in the InstantPot, but it seems pretty easy! My mom thinks I'm somehow cooking Thanksgiving dinner for her with my two year old so I'm on the lookout for easy recipes!
Yes, easy recipes will be the key when trying to cook with a two year old underfoot! :)
Buying an instant pot is on my wish list for Christmas. I love the gluten-free graham crackers crust, that looks easy and delicious.
My Instant Pot is now my favorite kitchen appliance. I use it almost every day! I hope your wish comes true :)
I think you hit all my favorite things in one recipe - eggnog, IP and cheesecake!! Following this recipe, you could actually serve it for breakfast. Maybe add a veggie side dish and some bacon. Christmas morning just got tastier!